Configuring AE & ESRI Mapping Integration
Steps for connecting to ESRI
Navigating to the Map Configuration
-
Login to Asset Essentials.
-
Go to Admin > Configurations.
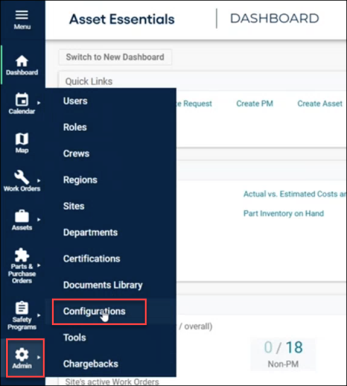
NOTE Users must have admin permission to edit system settings to see the menu option.
-
On the CONFIGURATION page, select Beta Map Configuration.

A new MAP CONFIGURATIONS page has opened.

-
On the MAP CONFIGURATIONS page, click Add New Connection.
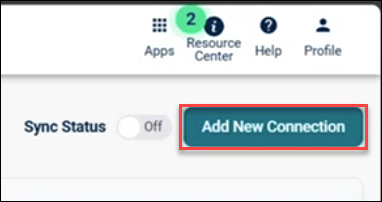
The Add Connection side panel appears.
Adding a Connection with ESRI
-
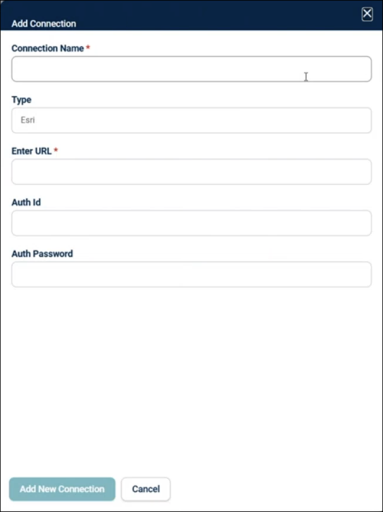
In the Add Connection window, provide the following:
-
Connection Name - Enter a name to help distinguish between different data sources.
-
Type – There are multiple connection types
-
Esri – Connect to your ArcGIS URL. This option allows for selecting specific layers instead of using a single map. It requires end users to customize their maps and add each layer to display manually.
-
Confirm Graphql – You can ignore this setting as not applicable to AE.
-
ArcGIS Portal – Connect to a web map ID in your ArcGIS Portal. Typically used by Esri ArcGIS Enterprise clients who use Portal for security and access management. Once this connection is added, all corresponding layers are automatically populated for end users in the map layers control, providing a consistent default view. Individual layers can also be added for syncing below the connection on the map configuration page. Users will be prompted to sign in with their ESRI Portal credentials on first access.
-
Esri (Map/Feature) Service – Connect directly to a map service or feature service URL. Typically used by Esri ArcGIS Enterprise clients who host their own GIS data on premises. Once this connection is added, all corresponding layers are automatically populated for end users in the map layers of control. Individual layers can also be added for syncing below the connection on the map configuration page. Note: 2-way sync is only supported when connecting to a Feature Service.
-
Web Map – Connect to a specific web map ID. Typically used by Esri ArcGIS Online clients who host their map services through ESRI. Once this connection is added, all corresponding layers are automatically populated for end users in the map layers of control, ensuring a consistent map experience. Individual layers can also be added for syncing below the connection on the map configuration page. Web Map connections do not support 2-way sync.
NOTE For more information on which option to choose to see the Benefits and Drawbacks for the Connection Types.
-
-
For ESRI connection type
-
Enter URL – Your ArcGIS URL, which can be obtained from the Overview page for the Layer you want to display on the map.
-
The URL might look like:
https://services1.arcgis.com/2AtcsBKgvgO/arcgis/rest/services/Grit_Bins/FeatureServer
Enter the URL up to /arcgis/rest.
Example:
https://services1.arcgis.com/2AtcsBKgvgO/arcgis/rest
-
-
Auth Id & Auth Password - For an authenticated connection, enter your Auth Id (username) and Auth Password (password). Leave these fields blank for an unauthenticated connection.
-
This user is used to connect to your account data. It is used to determine which layers can be connected to by AE and if you are able to sync the data 1 way or 2.
Note: Individual user logins to Esri from the AE map will still check if the specific user can see certain Esri data points or not. This user will not control those permissions.
-
Be sure this user can access any data you want to display inside of AE. This means access to the web map or map/feature service you are connecting to as well as the underlying layer of data.
-
This user is the one associated with the syncing of data when configured.
-
-
-
For ArcGIS Portal connection type
-
Enter Portal Web Map Id – Enter the web map id associated with the map from your portal that you would like to display.
-
Enter Portal URL – The ArcGIS Enterprise portal URL
-
Enter Access Token URL – The ArcGIS Portal token URL for generating authorization tokens for your account.
-
Auth Id & Auth Password - For an authenticated connection, enter your Auth Id (username) and Auth Password (password). Leave these fields blank for an unauthenticated connection.
-
This user is used to connect to your account data. It is used to determine which layers can be connected to by AE and if you are able to sync the data 1 way or 2.
Note: Individual user logins to Esri from the AE map will still check if the specific user can see certain Esri data points or not. This user will not control those permissions.
-
Be sure this user can access any data you want to display inside of AE. This means access to the web map or map/feature service you are connecting to as well as the underlying layer of data.
-
This user is the one associated with the syncing of data when configured.
-
-
-
For Esri (Map/Feature) Service connection type
-
Enter Service URL – The ArcGIS Enterprise service URL you want to display. This can be a map service or feature service.
-
Enter Access Token URL – The ArcGIS Enterprise token URL for generating authorization tokens in your account.
-
Auth Id & Auth Password - For an authenticated connection, enter your Auth Id (username) and Auth Password (password). Leave these fields blank for an unauthenticated connection.
-
This user is used to connect to your account data. It is used to determine which layers can be connected to by AE and if you are able to sync the data 1 way or 2.
-
Be sure this user can access any data you want to display inside of AE.
-
This user is the one associated with the syncing of data when configured.
-
-
-
For Web Map connection type
-
Enter Web Map Id – The ArcGIS Online map id associated with the map from your account that you would like to display.
-
Enter Access Token URL – The ArcGIS Online token URL for generating authorization tokens for your account.
-
Auth Id for Private Layer Sync & Auth Password for Private Layer Sync - For an authenticated connection, enter your Auth Id (username) and Auth Password (password). Leave these fields blank for an unauthenticated connection.
-
This user is used to connect to your account data. It is used to determine which layers can be connected to by AE and if you are able to sync the data 1 way or 2.
-
Be sure this user can access any data you want to display inside of AE.
-
This user is the one associated with the syncing of data when configured.
-
-
-
-
Click Add New Connection.
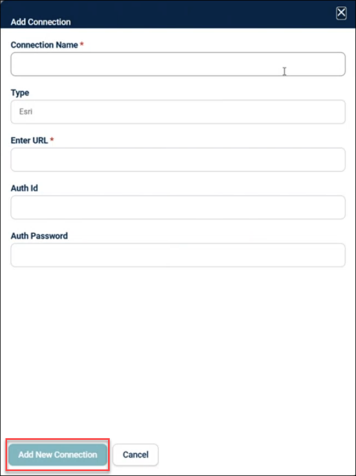
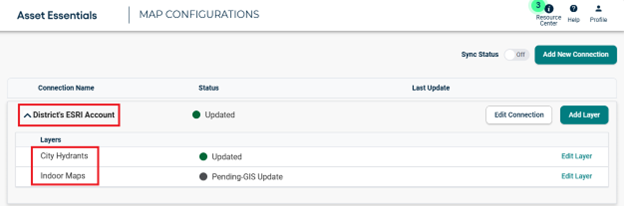
Once created, your connection appears on the MAP CONFIGURATIONS page.

NOTE When using the ArcGIS Portal, Web Map, or Esri (Map/Feature) Service connection types, the map/service you connect to will show as a layer with “Pending GIS Update” as its status.
Adding Layers
-
Ensure the Sync Status is set to Off. Layers cannot be added or modified if Sync Status is turned On.

-
Click Add Layer next to the Edit Connection button.

The Add Layer side panel appears.
-
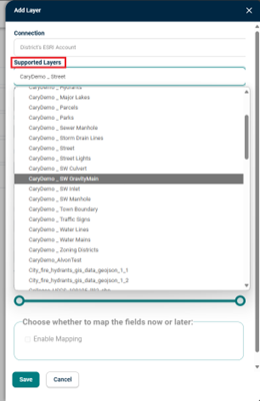
In the Add Layer window:
-
Click Supported Layers drop-down and wait for the list to load. Supported layers are fetched from ESRI based on the connection information you provided.
NOTE The supported Layers are populated using the /rest/services endpoint of ESRI.
-
Select from Feature Services or Web Maps. For Indoor Mapping, select the Web Map that contains your Indoor Mapping data.
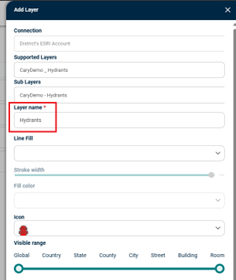
-
When a Web Map is selected, the Layer name is auto filled based on the ESRI name. You may edit this name if desired.
NOTE For synced features in AE mobile to display correctly, the Layer Name will need to match the exact layer name from the originating feature layer.
-
For Feature Services, you can select from Sub Layers (Feature layers) that you want to pull onto the map and assign them a display name.
-
Click on the Configure Field Syncing check box.

-
Select Site if applicable.
NOTE This selection can impact the ability to sync the location field in AE, as locations and sites have a strict link to each other.
-
Select Asset Category if applicable.
-
Select 2-Way Sync Priority; this controls whether AE or ESRI wins if changes are made in both places for a field at the same time.
-
Select Entity Filed and click Add.
NOTE If there are no valid fields to map to, you will see a notification displayed. In the scenario below, the ESRI layer did not have any data in a Date format; therefore, the field could not be mapped.
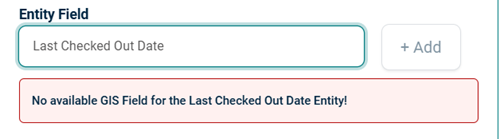
-
After clicking Add, a box appears with:
-
Entity Field- Asset data field present in Asset Essentials.
-
GIS Field- Choose the GIS Field from the Layer that you want to map to the AE field.
NOTE Only ESRI fields that match the data type will be displayed. For example, if you select an AE field that is a date, only ESRI fields configured as dates will appear. Similar constraints apply to fields restricted to numbers.
-
Sync Direction- Choose either two-way sync or sync ESRI to Asset Essentials only.
NOTE The GIS App may be the only option available if the layer is not configured for editing.
-
-
-
Click Save after you complete all edits.
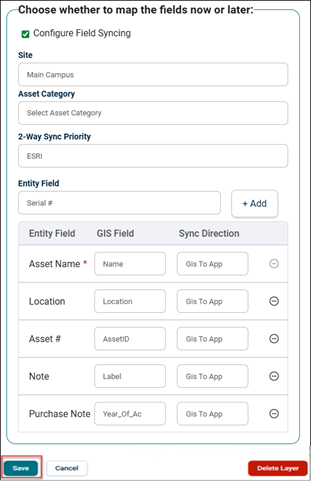
The saved layer can be accessed from the drop-down menu of its associated connection.
How the Sync Works
-
Once saved and the Sync Status is turned on, the initial data onboarding will begin. This will create a link between the ESRI feature and the AE asset.
-
Based on the sync direction, updates are checked in AE or ESRI every two minutes. When updates are found, the data is synced to the other system.
-
While updates are running, you can track their status. If errors occur, you can review the sync log to better understand why the sync may have failed.
Benefits of Syncing Assets
-
Assets that are synced can have work orders created directly from the map. Tracking work orders against these assets helps teams better understand the total cost of ownership of the equipment.
-
Syncing assets is a quick way to load asset records into AE.
Benefits and Drawbacks for the Connection Types
ESRI
Benefits:
-
Provides access to any data within your Esri organization without requiring the creation of a map.
-
Allow end users to customize which layers to show in their GIS Layer list.
-
Allows end users to organize the order the layers display in their list.
-
Allows users to customize grouping of layers.
Drawbacks:
-
Each layer that you want to display on the map must be added individually.
-
Each user must manually add layers they want to display on the map.
-
The display is not consistent across end users, so administrators cannot know exactly what each user sees.
ArcGIS Portal, Web Map, or Esri (Map/Feature) Service
Benefits:
-
One configuration to enter for the layers that display on the map.
-
The configured map appears for all end users automatically.
-
Admins know what end users are seeing.
-
Users can still customize which layers are showing up on the map, just not which ones show up in their GIS Layer list or the order of the list
Drawbacks:
-
Users cannot customize layers in AE. Layers are organized based on the Map or Services configurations.
-
Each layer within the map or service that you want to sync will have to be added one at a time.
